
 |
| For some pieces of furniture, shabby chic comes natural. This stool belonged to my grandma. |
Alright. You may not believe it, but I baked loads... before I started this blog. It just all comes together at the moment, moving flats and all.
So, in order to give this blog some life, some content, something, I decided to share my renovation experience.
The word of the year/past years when it comes to decorating surely is "shabby chic". I opted for this trend cos I like it and, well, sometimes it is so much less work. Unfortunately I didn't take pictures of the one dresser I painted, but trust me. As soon as you decide for shabby chic, only one layer of paint sometimes is all you need, no need to be thorough (unless the piece was originally a hideous orange or something. Cos the base colour will shine though). Just make sure to use a brush, not a roller. You wanna be able to see the strokes. Especially if your base is dark wood and you paint it white...
Anyways, I realise this is a bit frustrating without pictures, so I will talk you through "shabby chic" with another piece of furniture, a bureau, where I remembered to take pictures fairly early on. Here I did "shabby chic" the old-fashioned way, sandpaper and all. Trust me, not as easy as all the living and decorating magazines would have you to believe. But still easier than being neat and thorough...
I got this piece of furniture from a friend who was moving into a new flat and got that flat only on the condition that she would take care not only of the entire renovation, but also of getting rid of the previous resident's belongings in that flat. Ummmm... ok. Deal is deal and she was about to through this bureau away, so naturally I took it. I thought that with some paint it would turn out to be really nice. But behold... it didn't need painting! Just a decent scrubbing...

Dirty on the left, clean on the right. A difference of day and night!
So I exchanged my white paint for some concentrated cleaning agent and worked that thing. But now it looked too... clean. Not shabby at all. But not to worry! You helper in need is called Mr. Sandpaper:
 |
| Sandpaper. I used 80 and 40 grade/grit. |
So, take that sandpaper and really go to town with it. Maybe it was just my ancient bureau with its bombproof old paint, but I *really* had to work it to get any kind of effect. This is my result after a good hour of work (excluding all the scrubbing):
 |
| After hours of work |
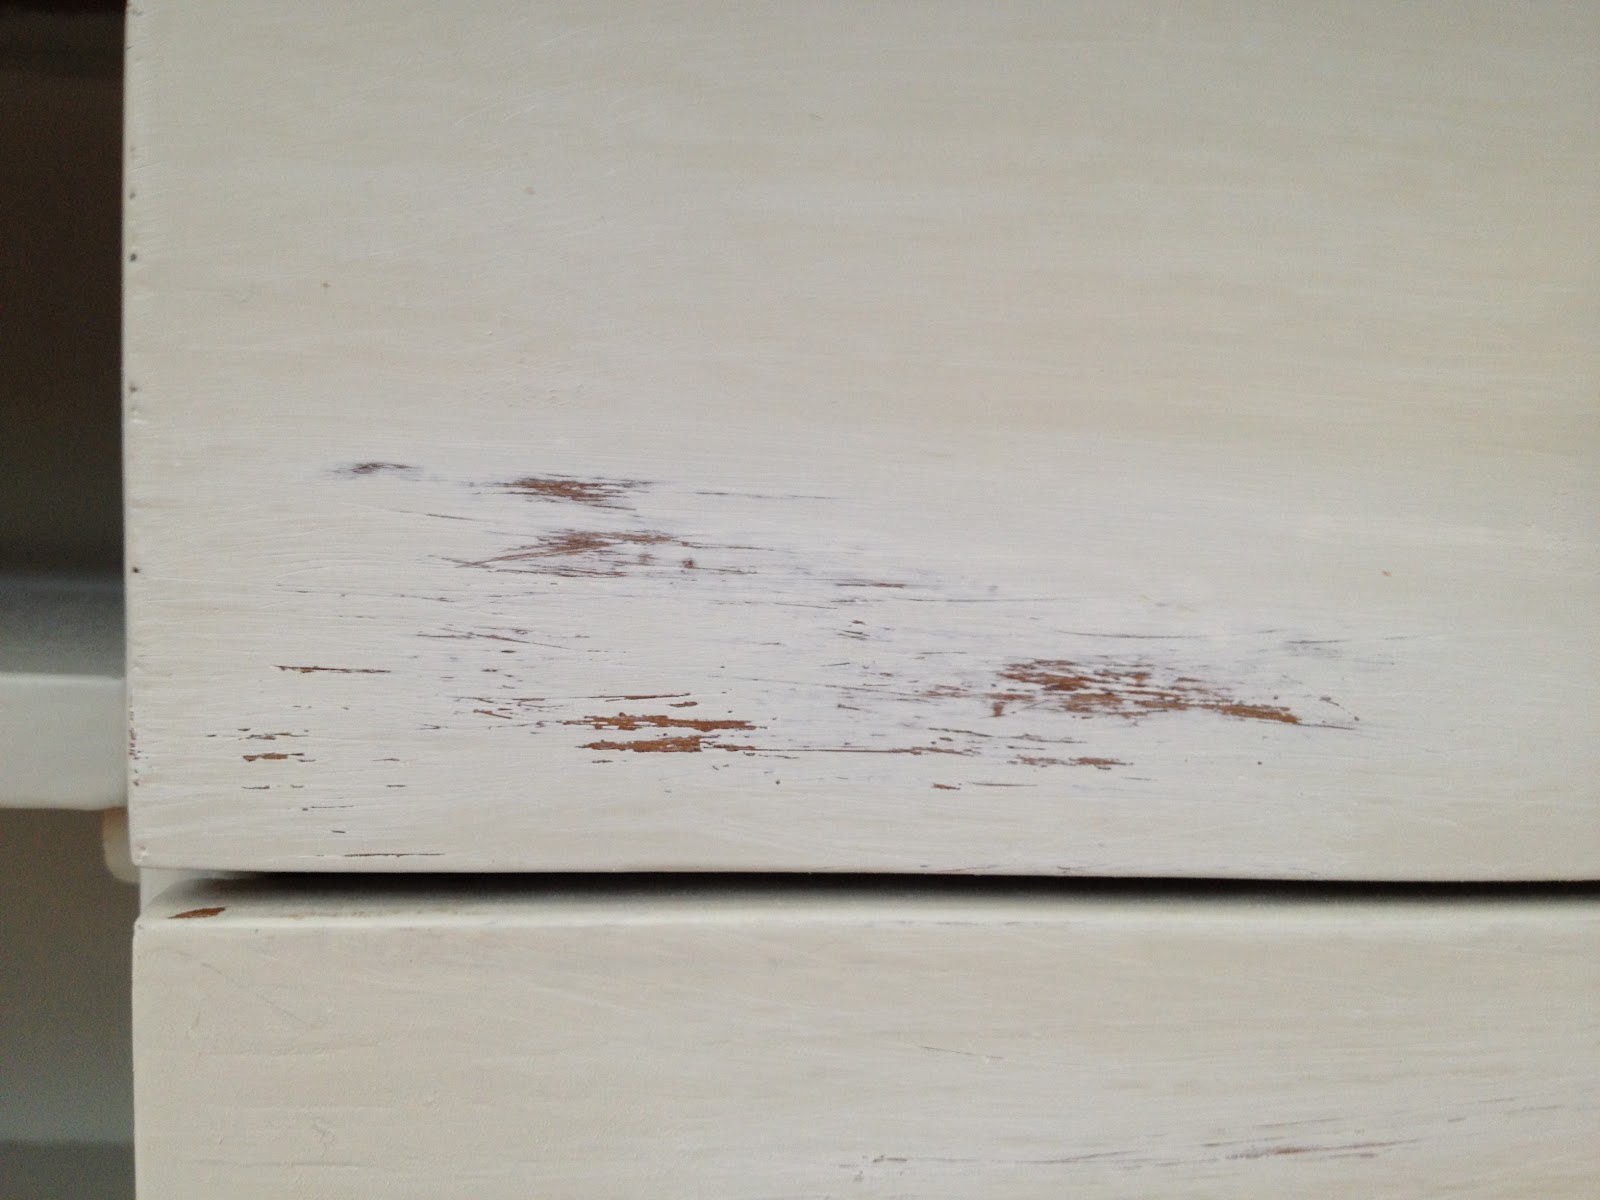
What? You cannot see my painstaking sanding? Maybe cos I didn't post a before-picture. That and cos the paint appeared to be really thick. Here are some close-ups. I suggest that anyone who *really* wants to go for shabby chic is a bit more daring/aggressive (and persistant) with the sanding:
 |
| Shabby chic 'how-to'. A bit at least. Be a bit more persistent and daring than I was. |
 |
| A bit more evident here, but I suspect the paint here (on the inside) wasn't applied as assiduously as on the outside. |
 |
| Close-up of shabby chic. |
I was fairly please with the result. Ok, fair enough, not as shabby as it could've been, but like I said, that paint was tough. However, I decided that I wanted dark grey highlights on that set of drawers. You see, my future living room has light grey walls, white dressings and dark grey highlights. Therefore, this now (after scrubbing) light grey bureau needed some dark grey detailing. It has some relief-like features that would be just darling in dark grey. Sooo... let's do it.
First wisdom I wanna impart here: prep the piece to be painted. This will take some time but save *loads* of time when actually painting it. Use masking tape to delimitate the area you want painted. This may be old news - but I initially thought that was for wusses. Nope! Really, really saves time and effort in the end.
 |
| Use masking tape to delimitate your play area |
 |
| Shabby chic thanks to sloppiness/laziness. Wayyyy more obvious when dried and in daylight. |
I swear it's much more visible now that it has dried. Again, a more adventurous decorator might be way more aggressive. My inner perfectionist just cannot be suppressed. It's a pain.
Another tip, obvious from the picture above: when painting, avoid direct artificial light. The light's reflex will make it tough to evaluate your actual work.
Once you're done painting your highlights, wait until you take off the masking tape. I'm of the impatient kind, so I ripped some off right away. Yeah, some colour comes off with it. So better wait.
As far as I'm concerned, you're done! This is what my bureau looks like:

So, back to the title of this post. What is "the truth about shabby chic"? In my opinion, one of the reasons shabby chic is so popular is because it allows you to be sloppy. Too impatient to wait for a layer of paint to dry before applying the next? Meh, just put on the next one after a few minutes. You'll scrape some paint off in the process, but hey, it's "shabby chic". Too lazy to apply paint evenly? No problem, you don't want thorough work with shabby chic. Can't be bothered to paint the old piece of furniture you inherited/found on the flea market at all? Shabby chic! ...the only time shabby chic is more work is when you try to shabby down an otherwise impeccable piece of furniture (like my bureau).
If you have any more ideas for the shabby chic look, feel free to share - I'm still amidst renovating/decorating my future flat and could use any advice.

PS: I will post more things that go with shabby chic over the next few weeks, as it's the main theme of my flat.
No comments:
Post a Comment